Wednesday 29 June 2016

Leaves Kind Thanks Card

Another of my two step stamping sets got dusted off and inked up - this time the SU! 'Gently Falling' set, full of beautiful leaves.

After stamping some leaves using a few different colour combos I chose Mint Macaron and Emerald Envy inks for the leaves on my card - stamping a mixture of full strength and stamped off images. After I'd fussy cut the leaves I stamped over them using a stamp from the 'Timeless Textures' set in Soft Suede ink - again using full strength and stamped off  ink.  I really wanted the leaves to take centre stage so I opted for a white background - actually, I think most two step stamped images are better shown off against a white or pale background.  I added some texture to the white background with the help of a woodgrain embossing folder and added the sentiment banner, attaching it to the woodgrain panel with a copper coloured brad.  I popped up the background panel over a mat layer of Emerald Envy CS and glued that to the front of a 5 1/4" square white card base.  

I then faffed about for a while arranging and popping up the leaves - I prefer careful positioning to plonking but it does take me ages!  Happily, while the Euro football games are on I have plenty of time - especially when there's a 0 - 0 score and they have to play extra time!  I know two step stamping cards can take me a long time to make so I thought they would be the perfect projects for me to create while the Euro tournament was on.  Owen much prefers me playing in my craft room while he's watching the footie - that way he doesn't get pestered with questions plus observations and opinions about tattoos and daft hair styles!   


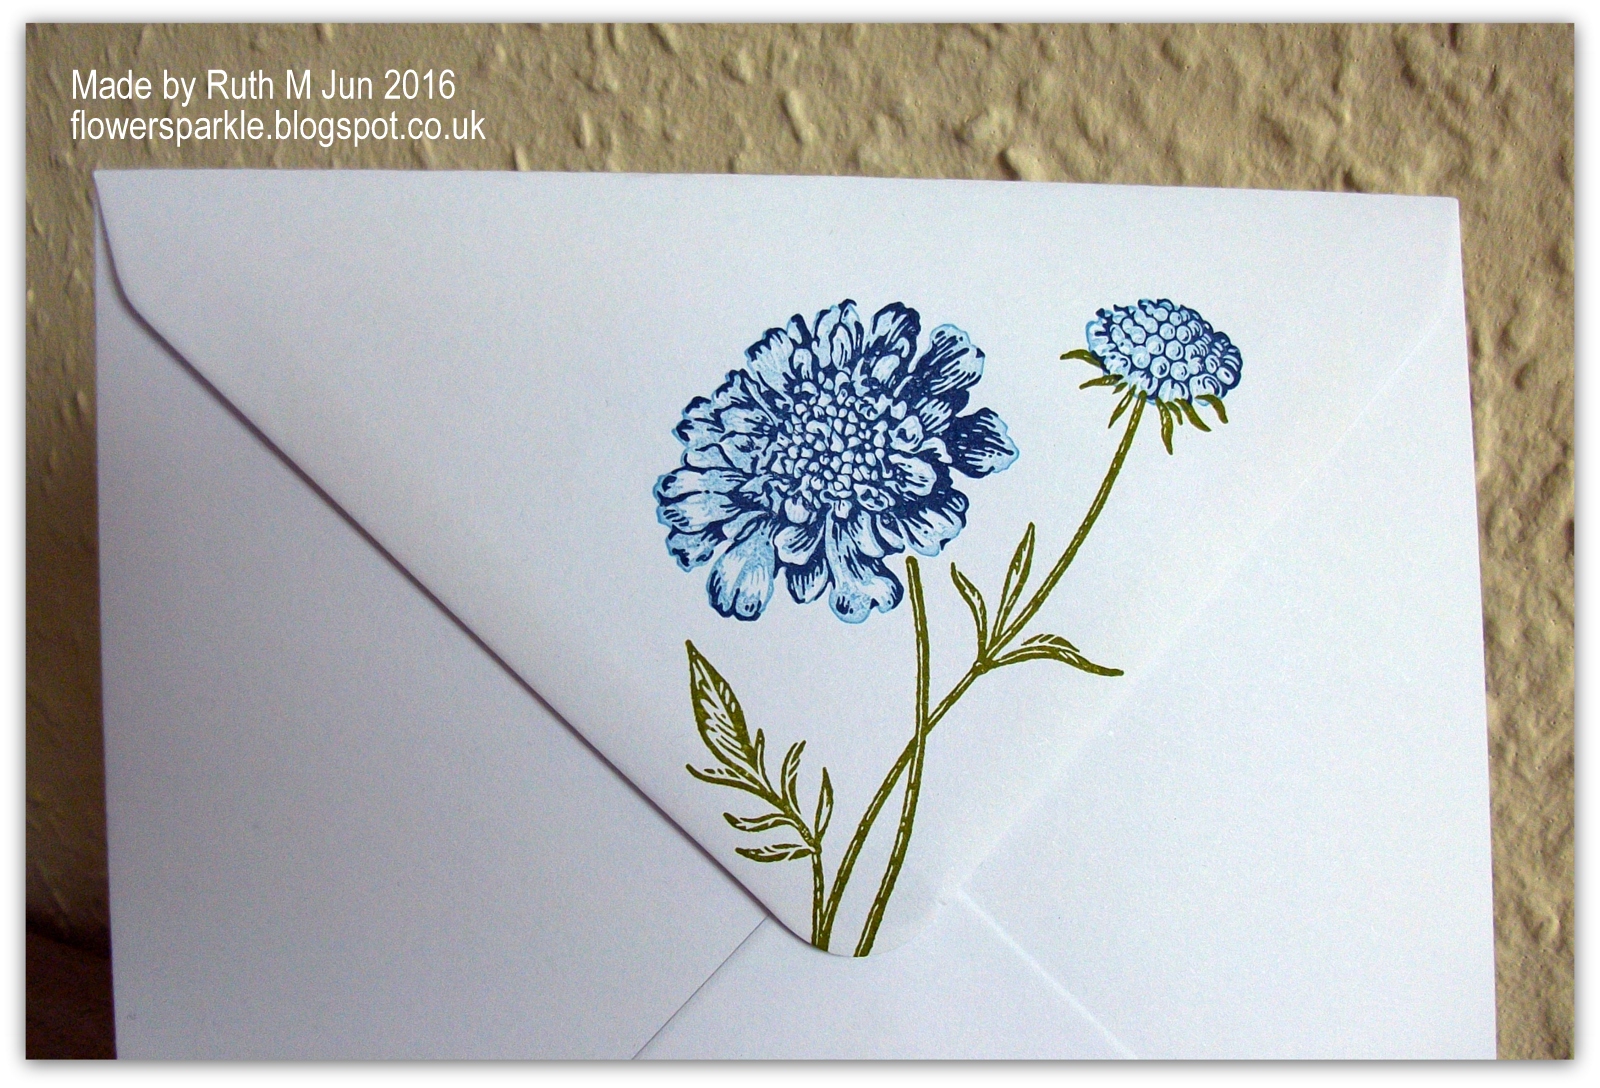
Here's the inside and envelope.  I wouldn't usually place a sentiment at the bottom but I figured nestled between the leaves was the best place for it.


Supplies:
Stamps: SU! 'Gently Falling'. 'Timeless Textures', 'Thank You Kindly' & 'Simply Sketched' sets
CS: PaperMania square white card blank, SU! Emerald Envy & Whisper White
Ink: SU! Mint Macaron, Emerald Envy & Soft Suede
Tools: SU! Woodgrain embossing folder, MFT 'Fishtail Flags Stax' die, Stamp-A-Ma-Jig
Embellishments & accessories: copper brad, SU! Dimensionals


 photo RoseRuth.gif


Monday 27 June 2016

Potted Tulips Birthday Greetings Card

Here's another two step stamping card, this one was made with the SU! 'Terrific Tulips' set.  I love the loose, brushed look these stamps have, they've been neglected for too long!

I stamped several leaves and a rainbow of tulips (after I'd finished my desk was covered with ink pads!) and got busy with my scissors fussy cutting all the images.  I thought the colourful flowers would look good against a white background so I decided to place my tulips in pots against a brick wall.  After dry embossing the white panel I very lightly brayered Crumb Cake ink over the panel and I inked the edges with Early Espresso ink.  I die cut the pots from white CS and added colour using sponge daubers with Cajun Craze and Mossy Meadow inks.  I wasn't sure what to do about a sentiment and went with a fun option - a faux wooden sign.  I added twine to the back of the sign and hung it using a screw brad.  I then glued the wall panel to the front of a Cajun Craze 5 3/4" card base.  You can't tell from the photos but I added twinkle to the tulips with a clear Wink of Stella pen and then arranged the flowers and popped up the pots.


More twinkly tulips went on the inside and the envelope.  Yay, another of my two step stamping sets got inked up and used - and it's another birthday card added to the stash!


Supplies:
Stamps: SU! 'Terrific Tulips' & 'Birthday Blossoms' sets, SU! 'Hardwood' background stamp
CS: SU! Cajun Craze, Crumb Cake & Whisper White
Ink: SU! Daffodil Delight, Crushed Curry, Blushing Bride, Rose Red, Wisteria Wonder, Elegant Eggplant, Peekaboo Peach, Pumpkin Pie, Sweet Sugarplum, Rich Razzleberry, Cajun Craze, Mossy Meadow, Crumb Cake, Early Espresso,  Pear Pizzazz & Old Olive, Memento Tuxedo Black
Tools: SU! 'Brick Wall' embossing folder, 'Flower Pots' Joanna Sheen Signature dies, Stamp-A-Ma-Jig, brayer, sponge daubers, paper piercer
Embellishments & accessories: twine, Woodware screw brad, SU! tiny silver brads, clear Wink of Stella pen, Dimensionals


 photo RoseRuth.gif

Saturday 25 June 2016

Blue Field Flowers Birthday Gap Card

Gap cards seem to be popular on Pinterest, I keep seeing them and I'd made a mental note to make one soon.  When I got out my SU! 'Field Flowers' set to make another two step stamping card I decided to make it a gap card.

I knew I wanted to use some paper from the SU! 'Floral Boutique' DSP pack so my colour combo had to include Night of Navy and white - I chose to add Marina Mist too.  The card base measures 5 3/4" square and the gap measures 2".  I glued the patterned paper pieces down first, added the white panel inside the card and stamped the sentiment.  I then stamped the image using Old Olive ink for the stem, Marina Mist ink for the solid flower images and Night of Navy ink for the outline images.  I matted and layered the panel and adhered it in place over the gap.  I stamped more flower images, fussy cut them and popped them up.


This floral image is one of my all time favourites, the flower is just so pretty!  I'd forgotten just how lovely it was and I so enjoyed using these stamps again!  Here's a closer look.


Here's the inside of the card.  I stamped and fussy cut two flower heads and added some rhinestone jewels around the sentiment.


Here's the envelope where I stamped the beautiful image onto the flap.  


Supplies:
Stamps: SU! 'Field Flowers' & 'Birthday Blooms' sets
CS: SU! Marina Mist, Night of Navy & Whisper White

Patterned paper: SU! 'Floral Boutique' DSP
Ink: SU! Old Olive, Marina Mist & Night of Navy
Embellishments & accessories: SU! rhinestone jewels, Dimensionals


 photo RoseRuth.gif

Thursday 23 June 2016

Detailed Floral Thanks To You Card

My sweet friend Lesley let me try out her new SU! 'Detailed Floral' Thinlits dies before she came to collect them from me.  I used the edger die in the set and cut out two separate pieces and made THIS CARD for Lesley using those pieces.  For the card I'm sharing today I didn't use the edger die when I die cut with the two fancy dies.  That way I ended up with one whole Night of Navy panel which I glued to the front of an A6 white card base.  I stamped just the 'thanks to you' portion of the sentiment, die cut it with a label die and glued it to the navy panel.  I stamped the floral image from the 'Floral Phrases' stamp set a few times in Crushed Curry ink, fussy cut the images and popped them up.  To finish the front I added a punched So Saffron butterfly with rhinestone jewels.


Here's a close up of the floral cluster - such a pretty image, I love it!


Here's the inside and the envelope.  I used some of the pretty paper from the 'Floral Boutique' DSP pack.  I fussy cut two flowers, glued the bottom one flat and popped the top one up.  My own set of 'Detailed Floral' Thinlits dies are winging their way to me - after trying them and discovering how lovely they were to use I just HAD to have them!


Supplies:
Stamps: SU! 'Floral Phrases' set
CS: PaperMania A6 white card blank, SU! Night of Navy & So Saffron

Patterned paper: SU! 'Floral Boutique' DSP
Ink: SU! Night of Navy & Crushed Curry
Tools: SU! 'Detailed Floral' Thinlits die set, SU! 'Bitty Butterfly' punch, Spellbinders 'Labels Trio' die
Embellishments & accessories: SU! rhinestone jewels, Dimensionals


 photo RoseRuth.gif

Tuesday 21 June 2016

Rose Wonder Pocket Birthday Card

Whilst browsing on Pinterest recently I came across the fab card below made by Lou Kitzelman using the SU! 'Rose Wonder' stamp and die sets.


It's a fun card - the stamped panel slides into a pocket created by the die cut wrapped around a piece of CS.  The die cut rose needs to line up with the stamped rose.

I was so taken with the idea that I just had to make one myself!  As I was nearing the end I realised I'd deviated from Lou's design - Lou placed her stamped rose panel on a mat layer but I missed out that step - ooops, I should have paid more attention!  I don't think it makes a huge difference to the finished card, I just placed my message panel on the back of the pocket piece.  I stamped onto watercolour paper and coloured with Bermuda Bay and Wild Wasabi inks and a water brush.  I opted for a black pocket rather than a Crumb Cake one and while I had the Curvy Corner Trio punch out to punch the ribbon slot I decided to round the top two corners of my stamped panel.  I loved the two strips of ribbon behind the sentiment so I copied that look from Lou's card.


Here's the card partially pulled from the pocket.


Here's the pocket and stamped panel side by side.


Here's the stamped envelope plus the back of the pocket card with my stamped message panel.  


This ingenious and inspiring idea was shared by a designer at a Stampin' Up! OnStage event.  Many thanks to the original designer and also to Lou for sharing her version and providing instructions!  Lou's blog post can be found by clicking HERE.

Supplies:
Stamps: SU! 'Rose Wonder'  & 'Butterfly Basics' sets
CS: SU! Basic Black & Whisper White, watercolour paper
Ink: VersaFine Onyx Black, SU! Bermuda Bay & Wild Wasabi
Tools: SU! 'Rose Garden' Thinlits die set, SU! 'Curvy Corner Trio' punch, water brush
Embellishments & accessories: SU! Bermuda Bay 1/8" stitched ribbon, Kaisercraft adhesive gems, SU! Dimensionals


 photo RoseRuth.gif

Sunday 19 June 2016

Lilacs For You Birthday Card

Continuing to use my old two step stamping floral sets!  For this card it's lilacs made with the SU! 'Blossoms Abound' set.

I love how the new SU! In Colour Sweet Sugarplum looks with Rich Razzleberry so I stamped my lilacs in those colours - stamping off the Sweet Sugarplum once first.  I used Old Olive and Pear Pizzazz inks for the stem and leaves.   I made a Rich Razzleberry card base measuring 5 3/4" square, added some dotty Rich Razzleberry paper on the side of my stamped panel, added a strip of Old Olive grosgrain ribbon, rounded the corners and adhered the panel to a mat layer of Sweet Sugarplum CS.  I added a an Old Olive border cut with one of the dies from the SU! 'Flourish' Thinlits die set.  I'd stamped an extra lilac flowers image and I fussy cut that and popped it up.  I stamped the three small flower images but used a punch to cut those out - not perfect but close enough and I didn't really fancy fussy cutting those teeny tiny shapes!


Here's how I decorated the inside of the card and the envelope flap.  I popped up the stamped and die cut sentiment label over the top of a strip of Sweet Sugarplum CS that I'd die cut using a Memory Box 'Grosgrain Ribbons' die.


The SU! 'Field Flowers' set will feature on my next two step stamped floral card, I'll share that here on the blog soon!

Supplies:
Stamps: SU! 'Blossoms Abound' and 'Birthday Blooms' sets
CS: SU! Rich Razzleberry, Sweet Sugarplum, Old Olive & Whisper White

Patterned paper: SU! Polka Dot Parade DSP
Ink: SU! Rich Razzleberry, Sweet Sugarplum, Old Olive & Pear Pizzazz
Tools: SU! 'Flourish' Thinlits die set, flower punch from SU! 'Itty Bitty Shapes' punch pack, Crop-a-dile Corner Chomper corner rounder, Memory Box 'Grosgrain Ribbons' die set, Spellbinders 'Grommet Tags' die set, Stamp-A-Ma-Jig
Embellishments & accessories: SU! Old Olive grosgrain ribbon, SU! Dimensionals


 photo RoseRuth.gif

Friday 17 June 2016

Roses On Hardwood Circle Happy Birthday Card

Currently I'm on a mission to use some of my old two step stamping floral sets.  For this birthday card I've used the retired SU! 'A Rose is a Rose' set.  Although I'm using an old stamp set I've used brand new inks - Flirty Flamingo and Emerald Envy which are two new SU! In Colours.

When working with two step stamping sets I stamp quite a few images, probably more than I'll end up using, doing all the solid images first followed by the outlines. I clean the stamps and set them to one side.  Then I fussy cut a few images and faff about with design and placement.  The reason I stamp more images than I need is that if I decide I need more images for the design I've got stamped images ready to be fussy cut and I don't have to get out the stamps and inks again.  I've learned from experience that lots of inky stamps and open ink pads on my desk are not ideal when I'm assembling a two step stamping card!

I stamped the flower images in Flirty Flamingo ink - stamped off once for the solid images and full strength for the outline images.  I stamped the leaves in Emerald Envy ink - stamped off twice for the solid image and full strength for the outline image.  For the rose bud stem I used stamped off once Emerald Envy ink.  I stamped the Hardwood background stamp on white CS with Smoky Slate ink and die cut a 4 1/4" circle.  I adhered a strip of shimmery black and silver polka dot paper to the 5 3/4" square card base and attached the stamped vellum sentiment strip to the circle with a brad.  I arranged the floral clusters, gluing the leaves to the circle but popping up all the flowers.  I then popped up the Hardwood stamped circle.  I added a few black metallic nailheads to complete the front.


More roses and leaves went inside and on the envelope flap.


Lilacs will feature on my next two step stamping card!

Supplies:
Stamps: SU! 'A Rose is a Rose' & 'Birthday Blossoms' sets, SU! 'Hardwood' background stamp
CS: SU! Whisper White (regular & thick)

Patterned paper: black & silver polka dot paper from DCWV 'Twinkle Glints' stack
Ink: SU! Flirty Flamingo & Emerald Envy, Memento Tuxedo Black
Tools: circle Grand Nestabilities die, Stamp-A-Ma-Jig, paper piercer
Embellishments & accessories: SU! brad base, black metallic nailheads, 3D foam tape & SU! Dimensionals


 photo RoseRuth.gif

Thursday 16 June 2016

Morning Glories Birthday Card

I've always loved multi step floral stamp sets and they seem to be really popular at the moment.  I have some old, long retired, two step stamp sets from Stampin' Up! and although I don't use them very often I know I won't be parting with them any time soon!   While Owen watches the Euro football games I head to my craft room so I'll have a fair amount of crafty play time over the next few weeks.  I decided to take the opportunity to unearth a few two step stamp sets and get inky with them.  As the sets are wood mounted my Stamp-A-Ma-Jig becomes my best stamping buddy!

For this card I've used the 'Marvelous Morning Glory' stamp set.  I made a 5 1/4" card base with the new SU! Dapper Denim colour.  I used Marina Mist and Dapper Denim inks for the flowers and Pear Pizzazz and Old Olive inks for the leaves.  I die cut a stitched square as my mat layer, stamped the sentiment and got busy fussy cutting all the stamped images.  I popped up the white mat layer and the three large flowers.  To finish the front I added a trio of silver sequins.


Here's the inside of the card and the envelope.  I am loving that Clearly Besotted 'Brushed Greetings II' stamp set, I'm so glad I got it - it went out of stock for a while but it was well worth waiting for!  


My next two step flower set that sees ink will probably be a rosy one so that card will be shown here soon!

Supplies:
Stamps: SU! 'Marvelous Morning Glory' set, Clearly Besotted 'Brushed Greetings II' set
CS: SU! Dapper Denim & Whisper White
Ink: SU! Marina Mist, Dapper Denim, Pear Pizzazz & Old Olive
Tools: Memory Box 'Stitched Square Layers' die, Stamp-A-Ma-Jig
Embellishments & accessories: silver sequins, 3D foam tape & SU! Dimensionals


 photo RoseRuth.gif


Tuesday 14 June 2016

Rosy Card & Gift Bag For Jan

It was Jan's birthday yesterday and I made a card and gift bag to give to her from me and Owen.  As with the card I gave her from me at card group I haven't used a 'happy birthday' sentiment.  I don't think that's entirely appropriate this year as this is the first birthday she will be spending without her much loved and missed husband Alan.  I worked yesterday afternoon but I met Jan for lunch so that at least she spent some time with someone else, I didn't want her to spend the whole day on her own.

Whilst browsing Pinterest I came across this lovely card made by Sharon Hashimoto Burkert and I decided I'd CASE Sharon's very pretty design for Jan's card.


Here's the card and gift bag together.  I'm very happy to say they were very well received!


Here's just the card which measures 5 3/4" square.  I stamped the floral image onto watercolour paper in VersaMark ink and heat embossed with white embossing powder.  I watercoloured with Pink Pirouette, Rose Red and Pear Pizzazz inks and a wet paintbrush.  I die cut the fancy border (from the SU! 'Flourish Thinlits' die set) from Pear Pizzazz CS - actually I cut two and overlapped them to get a continuous strip that would fit the width of the white panel - and I added some rhinestone jewels.  I popped up the white frame panel, I fussy cut the image and popped that up also.  I stamped the sentiments and the floral image on the white panel inside the card, added a die cut butterfly and some iced rhinestone embellishments.


Here's the inside of the card.


Here's the decorated envelope front.  After stamping the floral images I die cut one Pear Pizzazz  'Flourish Thinlits' border shape, cut it apart, glued both pieces down and popped up a die cut name label over the gap.  I added a couple of rhinestone jewels to the label to finish.


Here's the gift bag which I made using the WRMK Gift Bag punch board.  I popped up a watercoloured fussy cut floral image and tied the bag closed with white satin striped sheer ribbon.   


Supplies:
Stamps: SU! 'Birthday Blooms' set
CS: SU! Pink Pirouette, Pear Pizzazz, Rose Red & Whisper White
Ink: SU! Pink Pirouette, Pear Pizzazz & Rose Red, VersaMark
Tools: SU! 'Flourish Thinlits' die set, Square Nestabilities dies, Memory Box 'Bistro Label' & 'Chadwick Label' dies, WRMK Gift Bag Punch Board, heat tool, paintbrush
Embellishments & accessories: white satin striped sheer ribbon, SU! white embossing powder, Iced Rhinestone embellishments, Rhinestone Jewels & Dimensionals


 photo RoseRuth.gif

Sunday 12 June 2016

Blue Floral Note Of Thanks Card For Lesley

My good friend Lesley ordered some new SU! goodies from me and one of the items was the 'Detailed Floral Thinlits' die set.  I really liked the look of that whole 'Floral Boutique' suite on pages 76 - 77 of the new catalogue but I did wonder if the Detailed Floral Thinlits dies would be a pain to use as the design is intricate.  I do find it so frustrating and time consuming when a die won't cut properly or the die cut won't release from the die easily.  I can't be doing with the hassle and annoyance - especially these days when my crafting time is limited.  I know that I'll stop using the dies and they'll go into my 'to be sold on eBay' pile so for that reason I'm now wary of buying intricate dies.  I ordered most of the 'Floral Boutique' suite products but passed on the die set.  When I knew Lesley had ordered them I very cheekily asked if I could try her new dies out when I received them.  Lesley, being a real sweetheart said yes so I thought it was only right that I made her a thank you card with the dies!

I tried die cutting using the edger die and without the edger die and both cut beautifully and a die brush made short work of getting any leftover bits out of the die.  As I knew the die was intricate I did use one shim in my cutting sandwich and that was enough to get a perfect die cut.  So now, thanks to Lesley, I know the 'Detailed Floral Thinlits' dies are a pleasure to use without any hassle - oh dear!

For Lesley's card I used the two pieces that you get when you cut using the edger die as well as both detailed floral dies.  I simply glued the die cut panels to the front of an A6 white card base and stamped a sentiment from the 'Floral Phrases' stamp set in the gap.


Here's the inside and the envelope decorated with more stamps from the 'Floral Phrases' set.  I stamped the border on a separate piece of white CS, trimmed it to size and glued the strip under the sentiment.  

The floral image in the stamp set is so gorgeous - how amazing that you get colour shading using only one ink colour!  Here's a close up.


Supplies:
Stamps: SU! 'Floral Phrases' set
CS: PaperMania A6 white card blank, SU! Night of Navy & Whisper White
Ink: SU! Night of Navy
Tools: SU! 'Detailed Floral Thinlits' die set

 photo RoseRuth.gif


Thursday 9 June 2016

Painted Petals Free Standing Pop Up Card

My friend Jan's birthday is on Monday and this is the card I gave to her from me at card group last Thursday.  I haven't made a free standing pop up card in a long while and it was fun to make one again.  An unusual card that folds flat to go into an envelope is definitely a good thing!  I used a recent eBay purchase, the SU! 'Painted Petals' stamp set.  I love the watercolour effect of these pretty floral stamps!

My colour combo was Strawberry Slush, Wild Wasabi and Whisper White.  I cut an 11" x 4 1/8" piece of Strawberry Slush CS and scored at 1", 2 3/4", 3 3/4", 5 1/2", 7 1/4", 8 1/4" and 10".  I cut a slit along the centre score line for the image panel to slide through.  The Splitcoast Stampers website has a Free Standing Pop Up Card Tutorial HERE if you'd like to check that out.  Here's a front view of the card on display.


Here's a side view of the card.   


Here's a view of the card folded flat ready to be placed inside an envelope.  Personally, I prefer to position any dimensional elements towards the top so they don't get caught up in the slit so I was careful to place the butterfly at the top!  You can choose to add dimensional elements and/or bulky embellishments but you then have to ensure you cut a wider slit to accommodate them.


I adhered a stamped message panel to the back of the card and stamped the envelope flap.  Jan very sadly lost her husband Alan a few months ago and I'm conscious that this first birthday on her own is going to be an ordeal.  So I chose not to use a 'happy birthday' sentiment, opting for 'Best Wishes' and 'With Love' instead.  


I also stamped the front of the envelope and added a die cut name label and a butterfly.


Supplies:
Stamps: SU! 'Painted Petals' set, Clearly Besotted 'Brushed Greetings II' set
CS: SU! Strawberry Slush, Wild Wasabi & Whisper White
Ink: SU! Strawberry Slush & Wild Wasabi
Tools: SU! 'Simply Scored' score board, 'Curvy Corner Trio' punch & 'Beautiful Wings' Embosslits die, Sizzix Original 'Bookplates' die
Embellishments & accessories: SU! white stitched ribbon, rhinestone jewels, Dimensionals


 photo RoseRuth.gif


Tuesday 7 June 2016

Blue Bloom Birthday Easel Card

This is the card I made to give to Margaret B at our June card group meeting.  Margaret has been poorly so hasn't been at card group for a few months, she was very much missed and it was lovely to see her back again!

My colour combo is Pool Party, Island Indigo, Night of Navy and Whisper White.  I inked the bloom stamp with Pool Party ink and then added Island Indigo ink using a sponge dauber.  I added some sparkle by dotting some Star Dust Stickles here and there on the bloom.  I popped up the Island Indigo mat layer plus the sentiment label.  I added die cut decorative corners on top of the patterned paper layer to finish the front.


Here's a close up of the bloom.


Here's the bottom of the card plus the envelope.


Supplies:
Stamps: SU! 'Blooming with Kindness' set, Hero Arts 'Sending you Love' set, Woodware 'Best Wishes'
CS: SU! Pool Party, Island Indigo, Night of Navy & Whisper White

Patterned paper: SU! Pool Party In Color DSP
Ink: SU! Pool Party, Island Indigo & Night of Navy
Tools: Lacy Square & Square Nestabilities dies, Hero Arts 'Small Tag Frame' Framelits die, SU! 'Curvy Corner Trio' punch, Die'Sire 'Decorative Corner 1' die set, small handheld circle punch, sponge dauber
Embellishments & accessories: Star Dust Stickles, SU! Night of Navy grosgrain ribbon, Night of Navy candy dots, Dimensionals


 photo RoseRuth.gif


01 09 10